Self-Hosting with Coolify, Raspberry Pi, and Cloudflare

Cloud services like AWS, Google Cloud, Azure, Heroku, and Vercel offer significant advantages, including powerful features and ease of use. However, for hobby projects or small-scale applications, these services can be costly and may exceed what’s needed. I realized that paying for cloud services didn’t make sense for my small projects. Even DHH has opted to move away from cloud hosting.
Inspired by my talented friends Eralp, Mehmet, and Baris, I decided to host my projects on a Raspberry Pi. I will share my journey of setting up self-hosting using Coolify, Raspberry Pi, and Cloudflare, providing a practical guide for others who want to do the same.
Introduction
Why Choose Self-Hosting?
- Self-hosting is affordable, accessible, and offers the opportunity to gain hands-on experience with web servers, Docker, networking, and other technical skills. It’s a great way to learn and experiment without the constraints and costs associated with cloud providers.
Why Raspberry Pi?
- Raspberry Pi is affordable, compact, and powerful enough for hosting small to medium projects. It’s an ideal choice for hobbyists and developers who want to experiment without breaking the bank. Its low power consumption and small footprint make it perfect for running a server at home or in a small office.
Why Coolify?
- Coolify was created to provide a simpler, more cost-effective alternative to platforms like Vercel. The founder sought to eliminate the expensive bills associated with traditional cloud services. Coolify offers many of the same features, allowing you to self-host your applications without the high costs. For more information about the project, visit their GitHub page.
Why Cloudflare Tunnels?
- I wanted to avoid exposing my ports directly to the internet. Since I don’t have a static IP, managing IP changes can be cumbersome. Cloudflare Tunnels provided a convenient solution for securely accessing my applications. For more information, check out Rasmus’s guide on setting up Cloudflare Tunnels.
Setting Up the Raspberry Pi
-
Choosing an Operating System
- The minimum recommended server specifications for Coolify are 2 CPUs and 2GB of memory. The Raspberry Pi 4B with 4GB of memory is suitable for this. Coolify recommends using Raspberry Pi OS, which you can learn more about on their website.
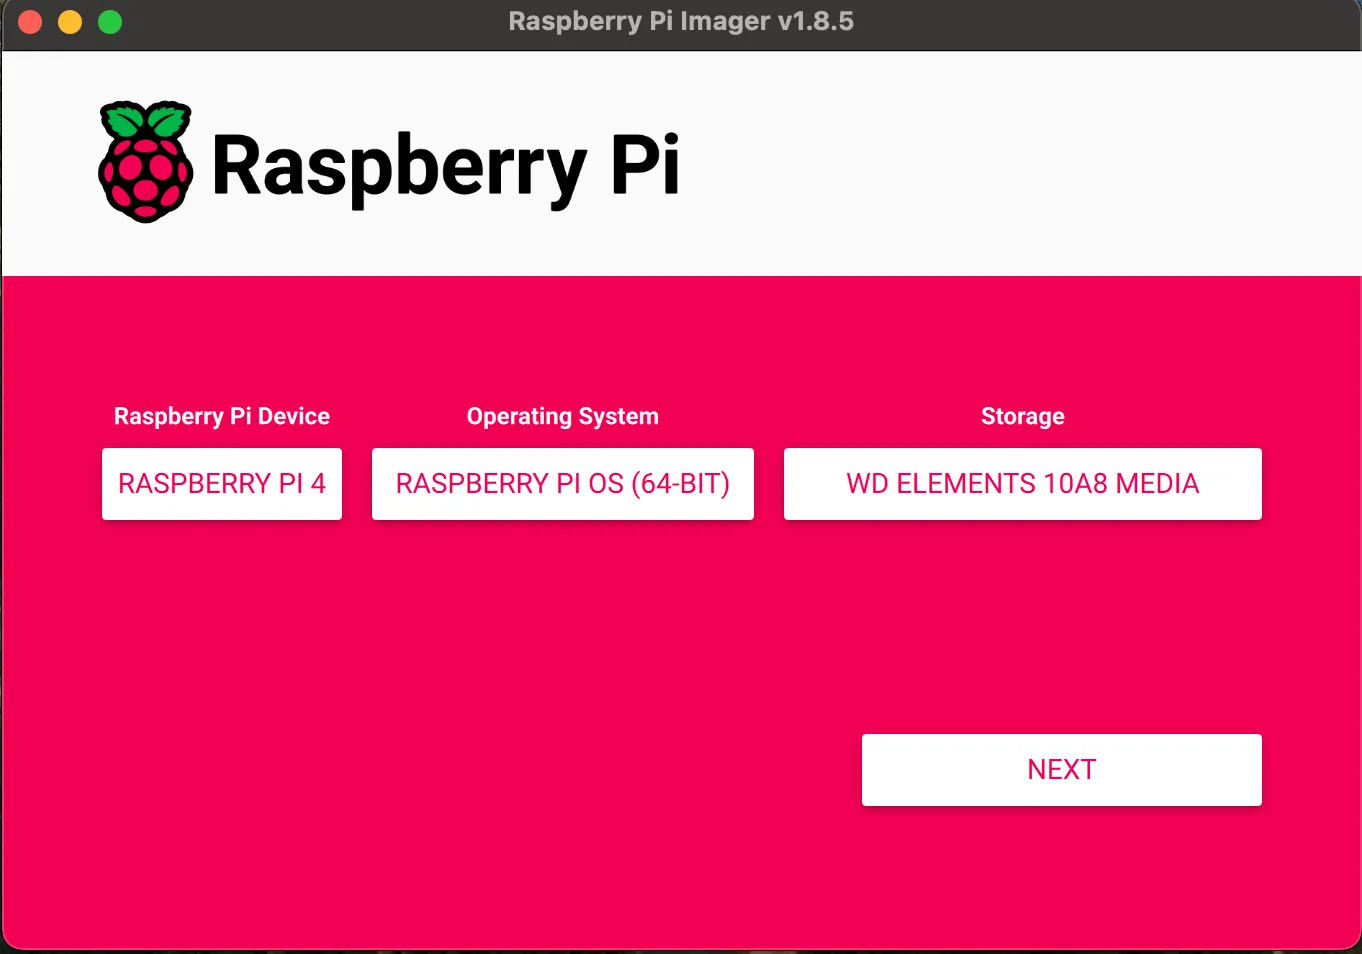
- The minimum recommended server specifications for Coolify are 2 CPUs and 2GB of memory. The Raspberry Pi 4B with 4GB of memory is suitable for this. Coolify recommends using Raspberry Pi OS, which you can learn more about on their website.
-
Configuring the OS
- After selecting the OS, configure the settings. Make sure to hide any sensitive information (e.g., Wi-Fi names, passwords) in your screenshots.
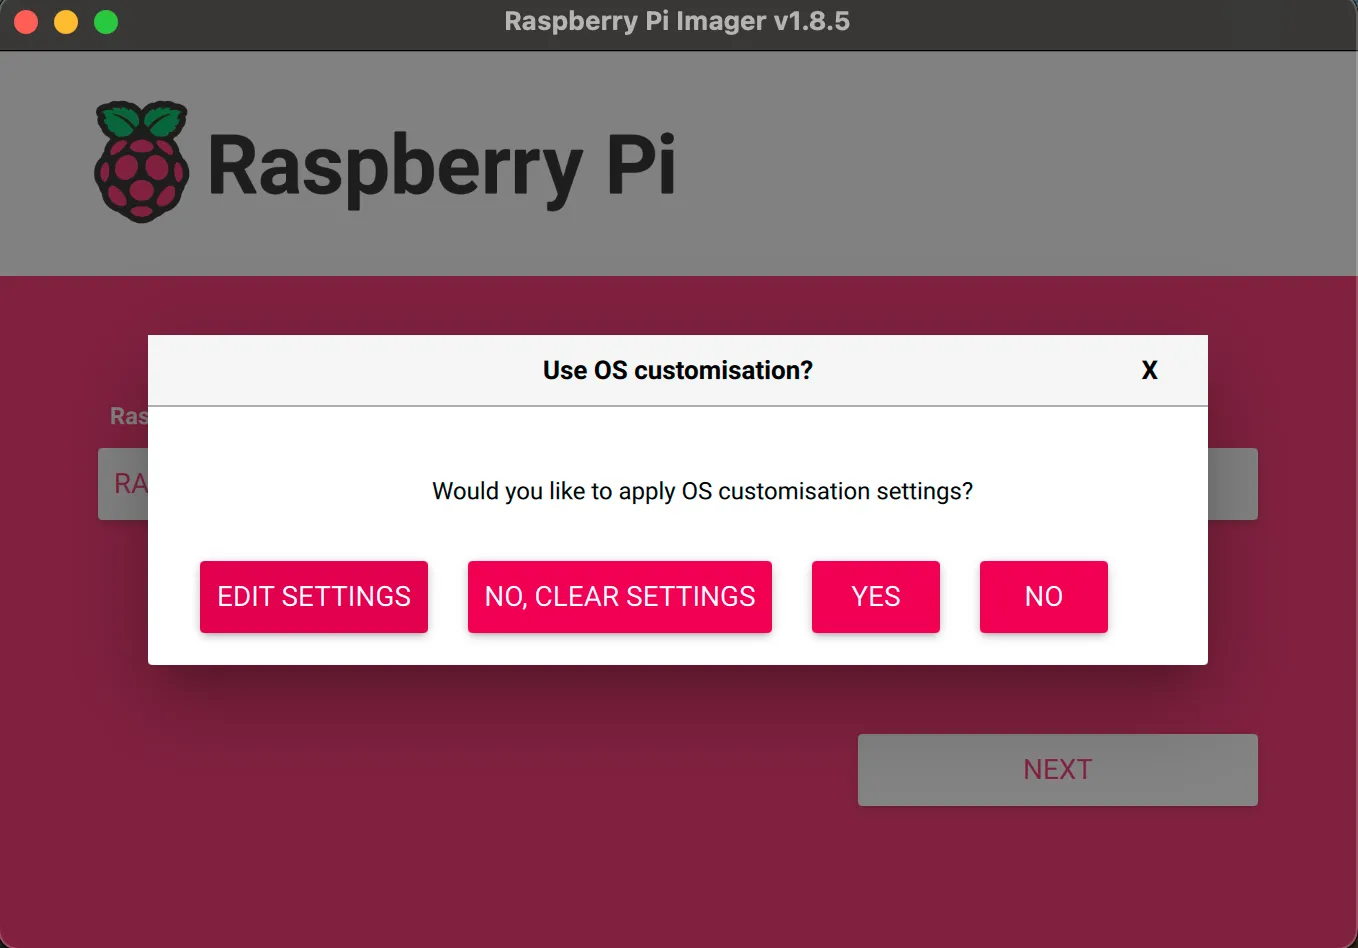
- After selecting the OS, configure the settings. Make sure to hide any sensitive information (e.g., Wi-Fi names, passwords) in your screenshots.
-
Setting Up Hostname, Username, and Password
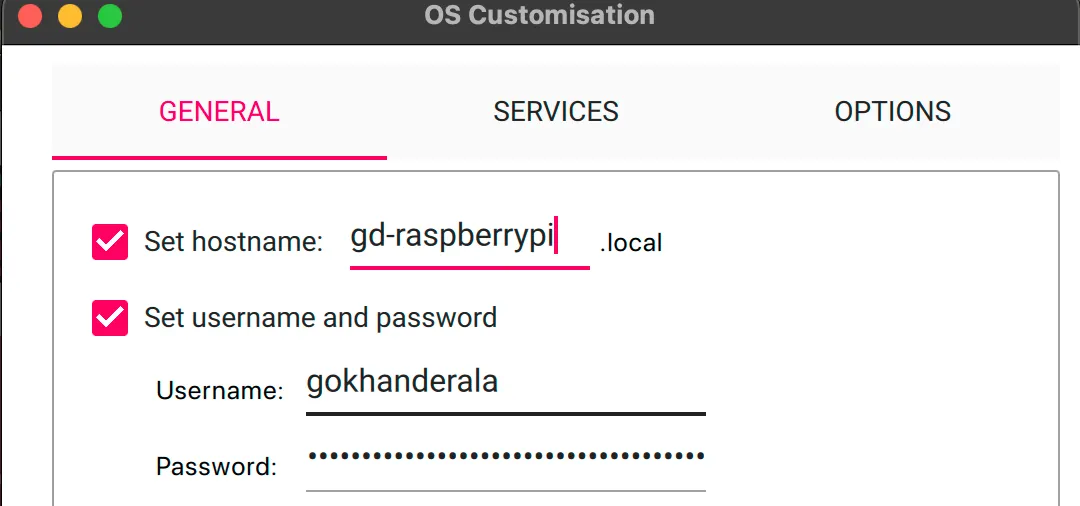
- Configure a hostname, username, and password for the Raspberry Pi. These will be used for SSH connections. You can also create an SSH key under the options to make future logins more secure.


- Configure a hostname, username, and password for the Raspberry Pi. These will be used for SSH connections. You can also create an SSH key under the options to make future logins more secure.
-
Connecting to the Raspberry Pi
- Once the OS setup is complete, connect to the Raspberry Pi’s terminal via SSH. You’re now ready to install Coolify. Follow the Coolify installation guide. After installation, you can access Coolify at http://raspberry_hostname:8000.
- For a detailed video tutorial on setting up Coolify, I recommend watching the Syntax YouTube channel tutorial.
Setting Up Cloudflare Tunnel
-
Create a Tunnel in Cloudflare
- After installing Coolify, visit the Cloudflare dashboard and create a tunnel. Go to the “Zero Trust” section on the left.
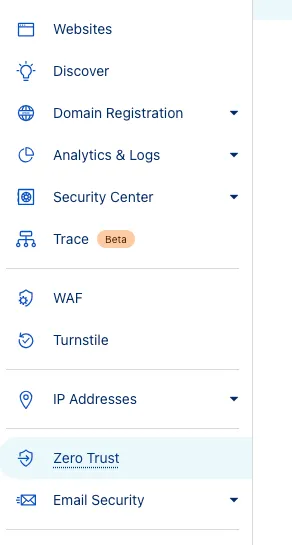
- After installing Coolify, visit the Cloudflare dashboard and create a tunnel. Go to the “Zero Trust” section on the left.
-
Access Tunnels Under the Network Section
- You can find the tunnels listed under “Networks.”
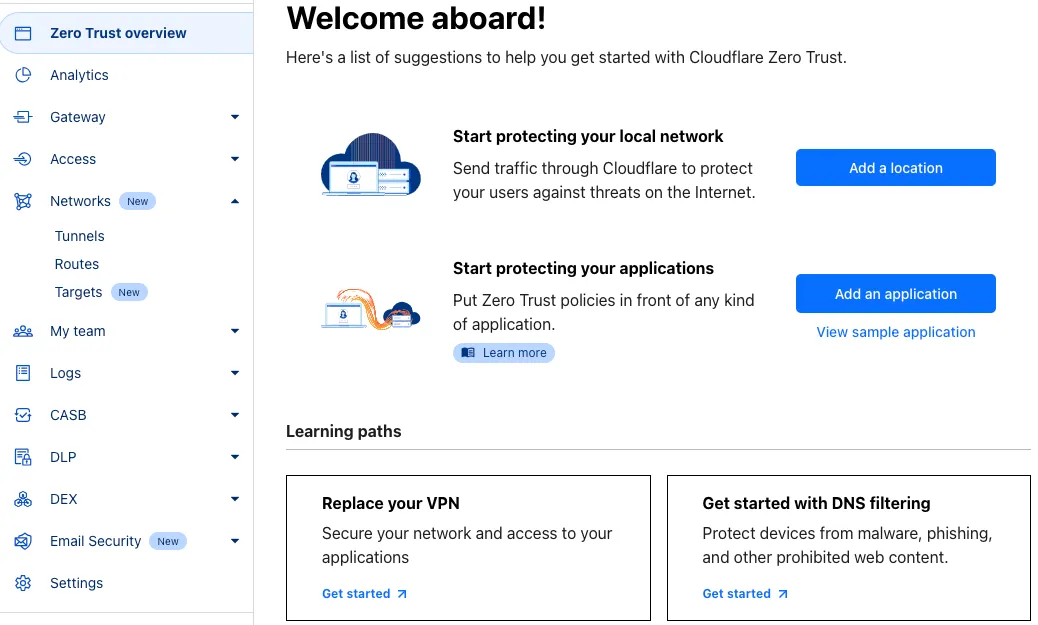
- You can find the tunnels listed under “Networks.”
-
Install Cloudflared on Raspberry Pi
- Follow the recommended Cloudflared installation steps. When using Docker, run the provided commands on the Raspberry Pi.
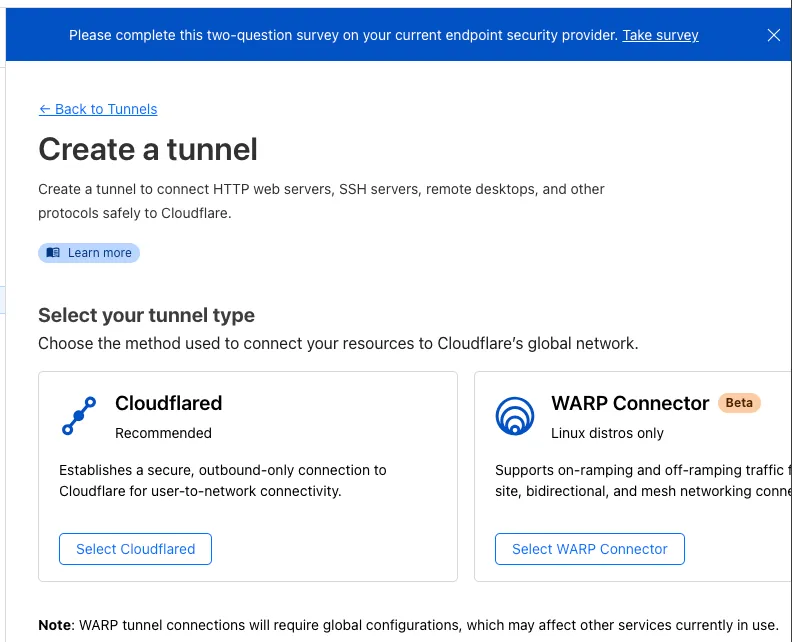
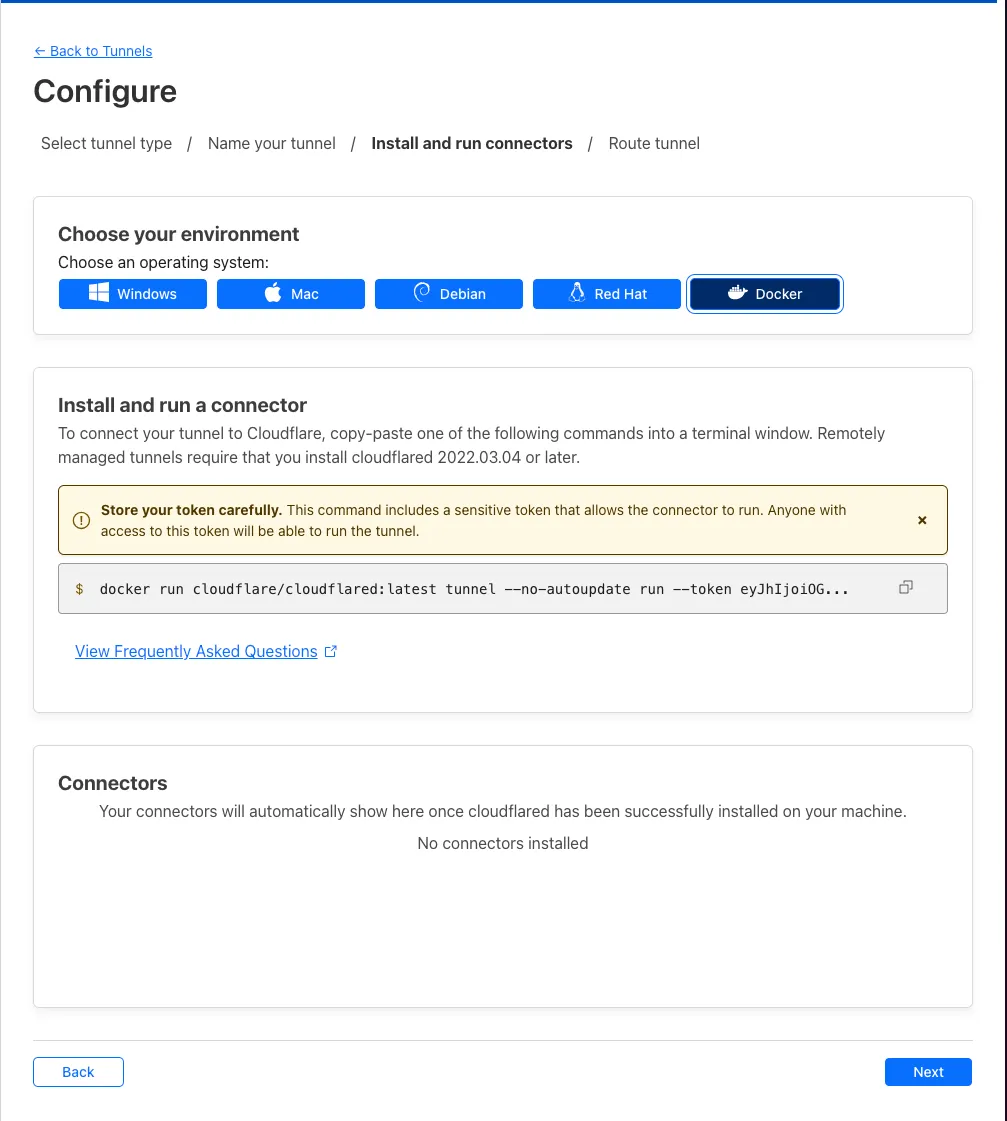
- Follow the recommended Cloudflared installation steps. When using Docker, run the provided commands on the Raspberry Pi.
-
Configure the Tunnel to Your Raspberry Pi Hostname and Ports
- Ensure the tunnel is configured to point to your Raspberry Pi’s hostname and the appropriate ports.
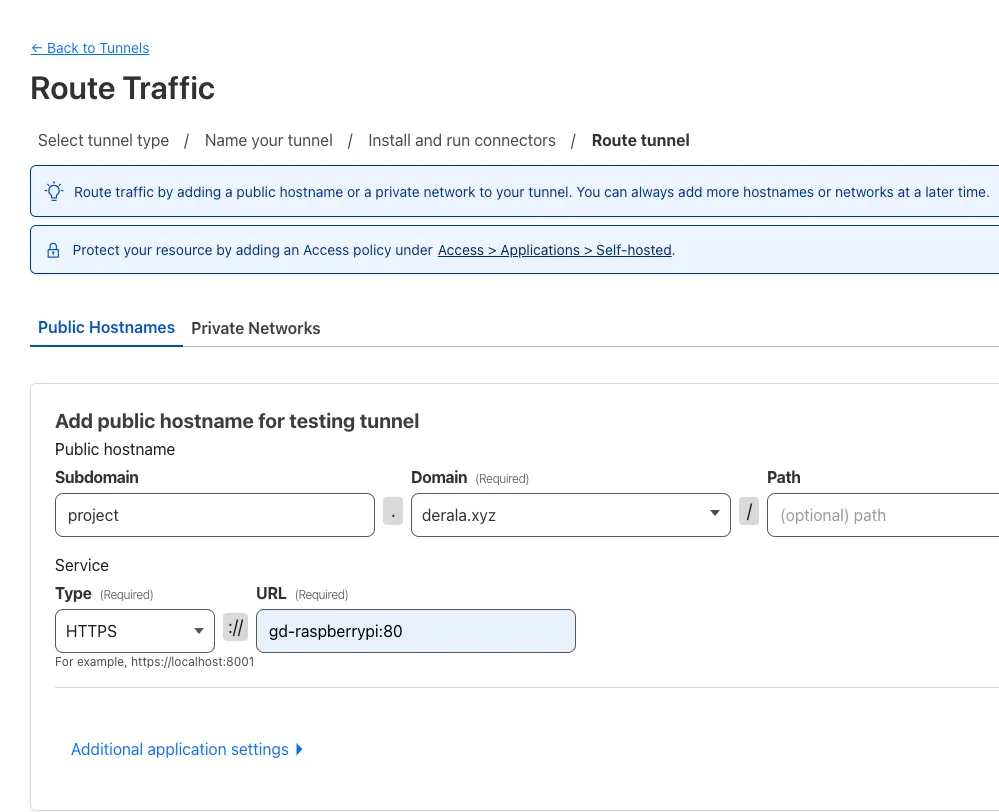
- Ensure the tunnel is configured to point to your Raspberry Pi’s hostname and the appropriate ports.
-
Verify the Tunnel Status
- Go back to the tunnels list to confirm that the tunnel status is “Healthy.” You can also verify the tunnel is running by executing docker ps on the Raspberry Pi.
Deploying an Application with Coolify
-
Create a Project in Coolify
- Start by creating a new project in Coolify.
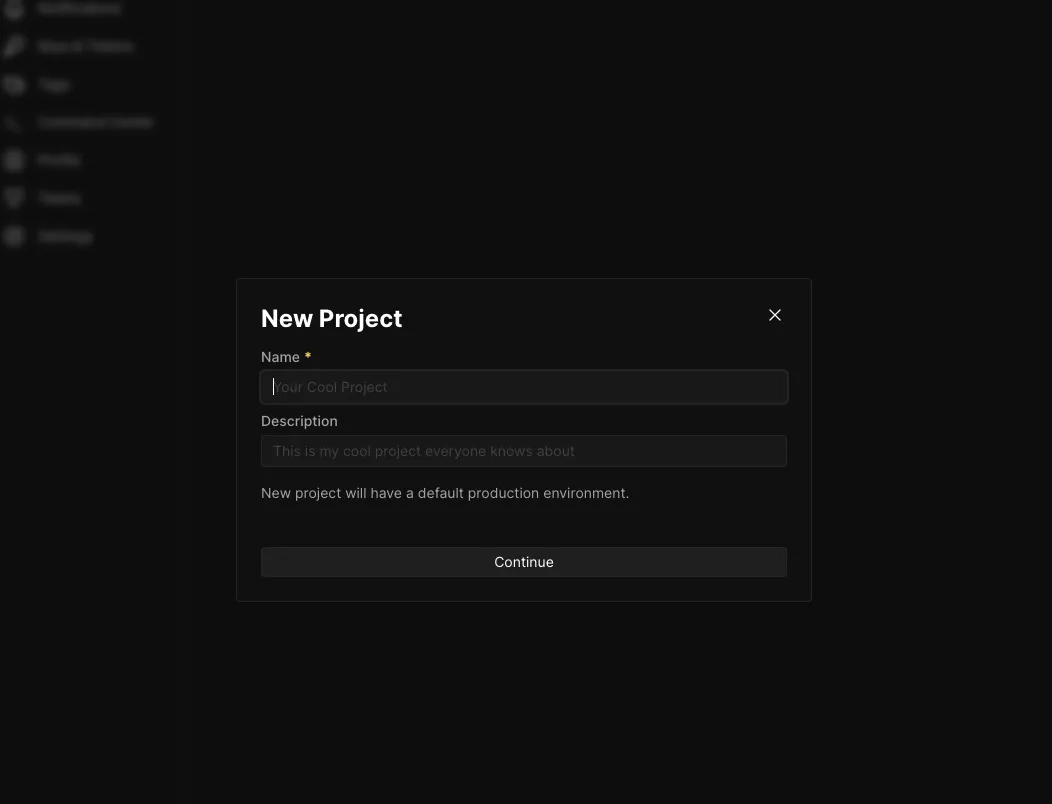
- Start by creating a new project in Coolify.
-
Connect to Your GitHub Repository
- Link your project to a GitHub repository for continuous deployment.
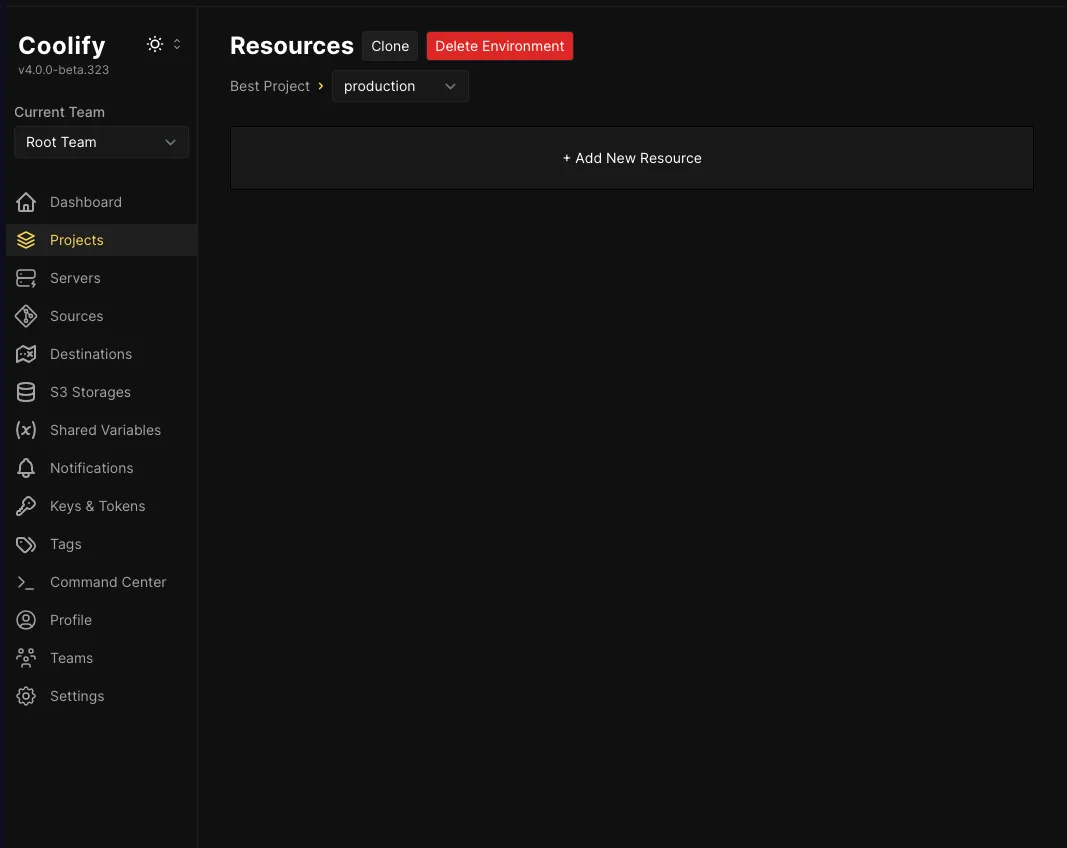
- Link your project to a GitHub repository for continuous deployment.
-
Create a New Application
- Set up the application and configure its deployment settings.
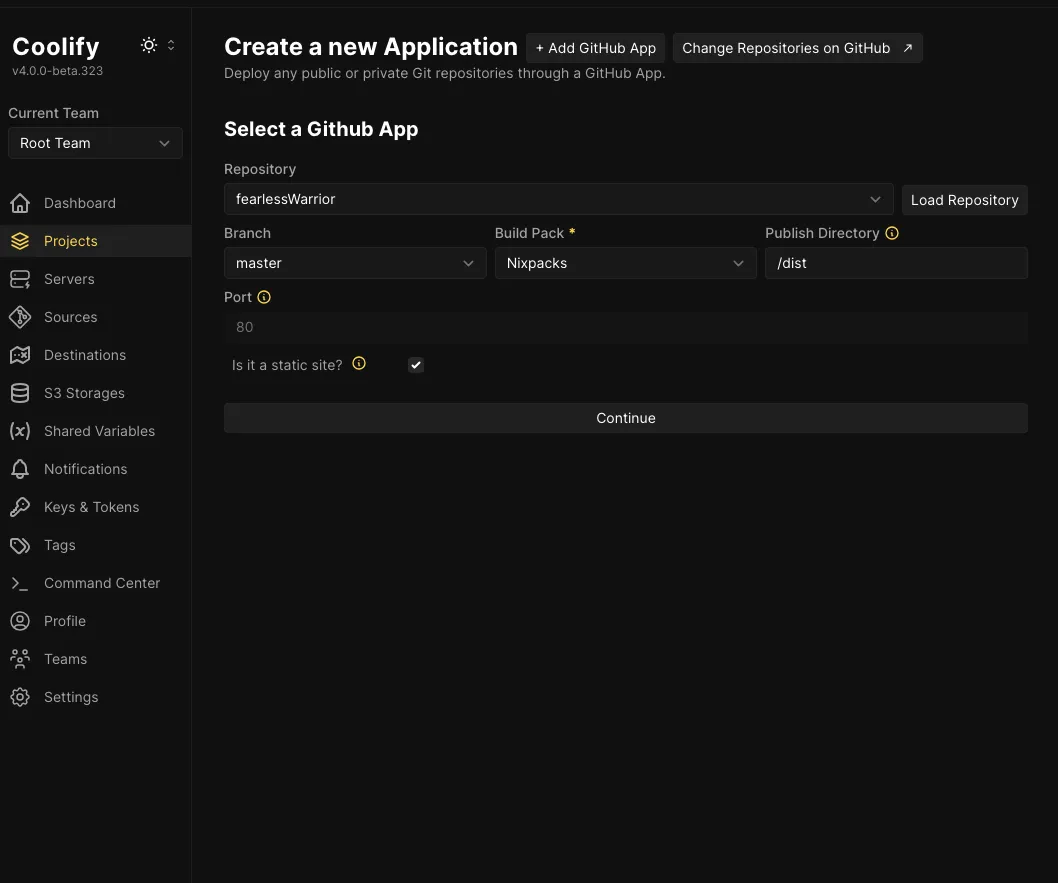
- Set up the application and configure its deployment settings.
-
Map the Application to Port 80 for the Cloudflare Tunnel
- Make sure your application is accessible through port 80 for the Cloudflare Tunnel configuration.
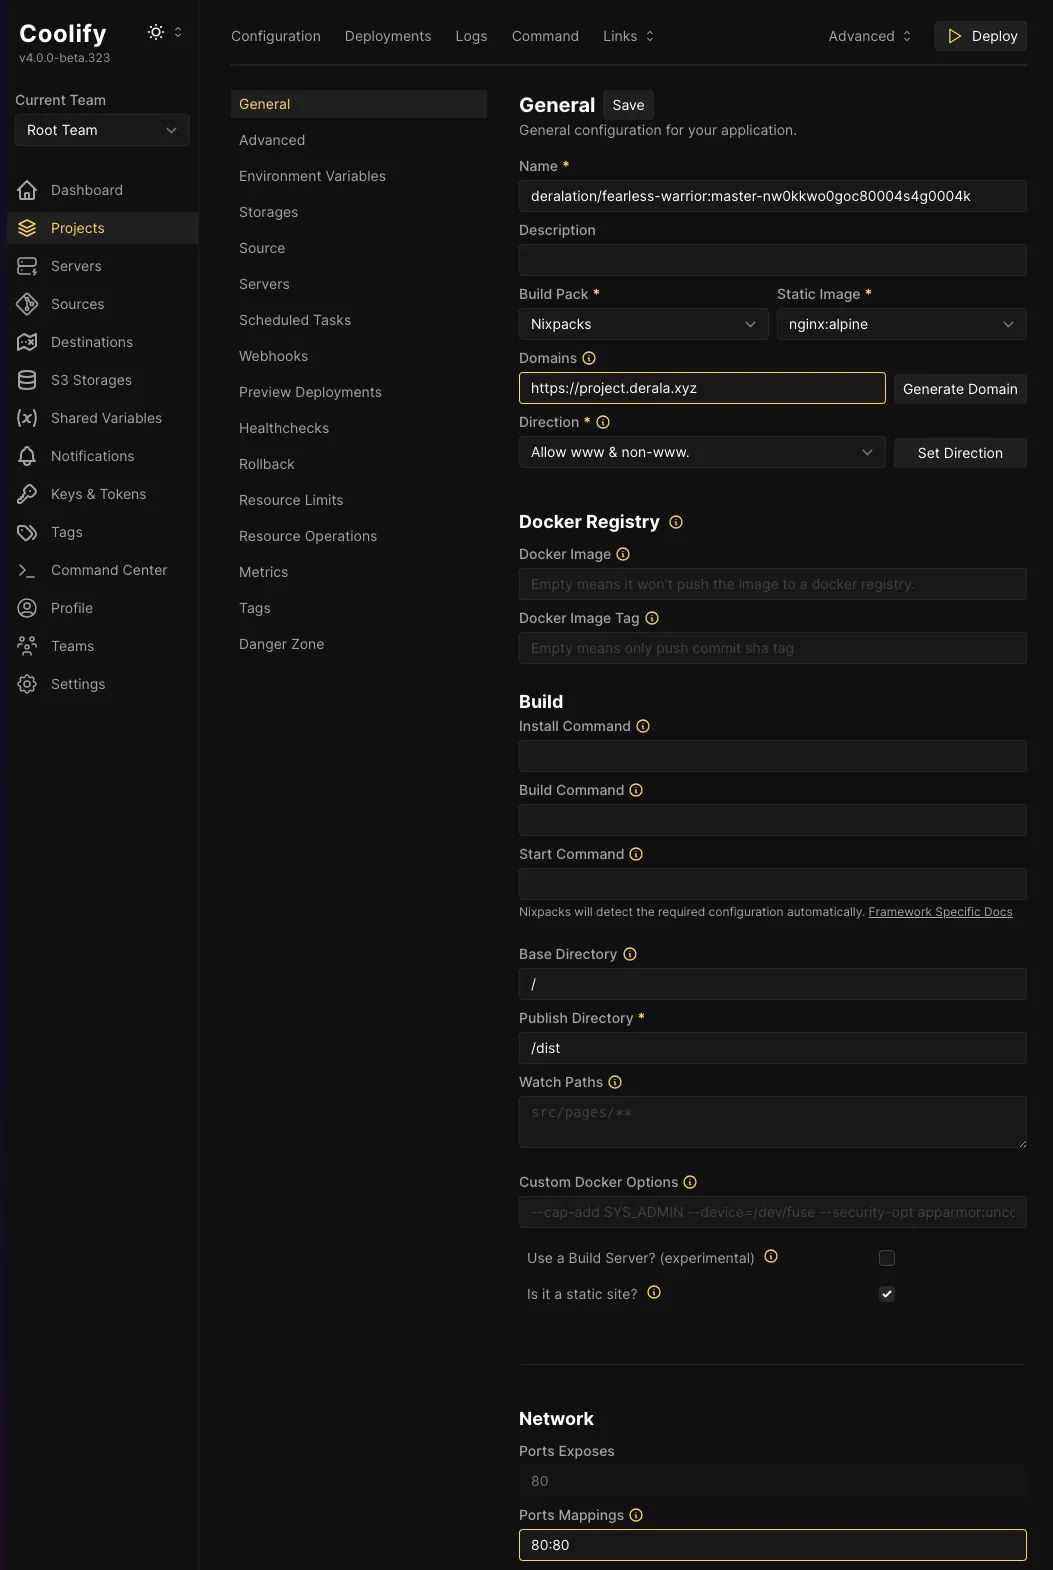
- Make sure your application is accessible through port 80 for the Cloudflare Tunnel configuration.
-
Verify the Application Deployment
- After deploying, you should be able to access your application via the domain configured with Cloudflare.
Conclusion
Self-hosting your projects using a Raspberry Pi, Coolify, and Cloudflare Tunnels provides a unique opportunity to learn about infrastructure management and deploying web applications.
By taking control of your own hosting, you not only save on costs but also gain deeper knowledge of the deployment process. Self-hosting empowers you with full control over your projects, enabling greater customization and flexibility. I encourage you to try this setup for your own projects and explore the world of self-hosting. Feel free to reach out or share your experiences – I’d love to hear about your journey!